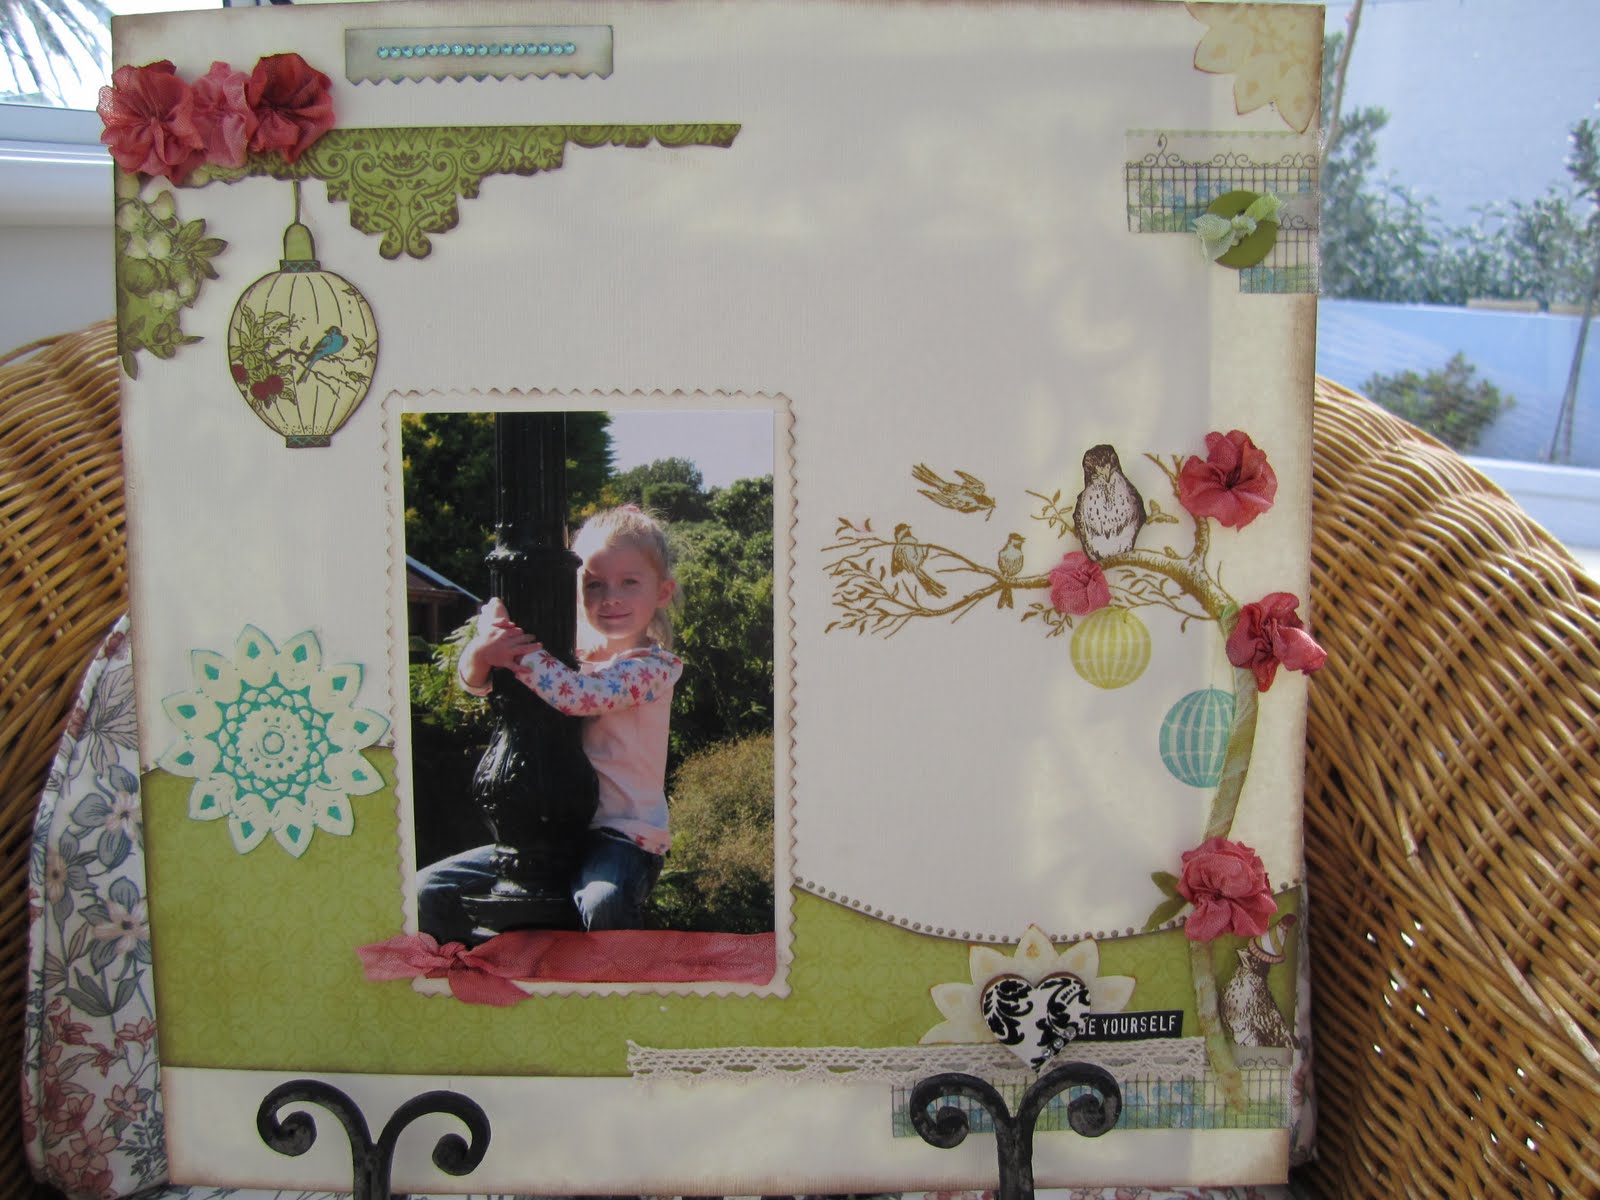
This months challenge at the Paper Chase was to interpret a layout and create your own based on the rough sketch. Check it out here on faceboook https://www.facebook.com/#!/groups/362066385406/ or here on the blog http://paperchase.typepad.com/nzpaperchasemy_weblog/2012/02/three-days-left.html.
Another requirement was to use some sort of medium to create texture, so I modpodged tissue paper to the background, added some texture gel then paint. I've also used Liquid Pearls to give extra texture. So here's my interpretation.
You have until 29th to get your entry in....check the NZ Paperchase Magazine blog to see the goodies up for grabs for the lucky winner.
28 February 2012
26 February 2012
Mini Break
Back from a short break at Ruakaka Beach. Love it there - only 1.5 hours from Auckland and an easy drive. Beautiful, unspoilt beach with 'squeaky clean sand' as my children call it! Wonderful summer days.
22 February 2012
'Frame It' Challenge at Cheery Lynn Designs
I've been enjoying playing with my Cheery Lynn Designs dies (again) and I have to say that their frame dies offer so much potential. I created a card today for the 'Frame It' challenge, using my favourite Daisy Lace Frame. Reminds me so much of a beautifully ornate wrought iron fence - the sort you'd likely see in Florence or somewhere equally as romantic!
I first created the Daisy Lace die cut from cardstock then adhered it to scrunched up Tim Holtz printed tissue paper to get a bit of texture going on behind it. Then I gave it a paint with watered down white acrylic paint to give it a base from which to work from. This also enabled the diecut to 'sink' into the tissue. Using gold patina wax and Distress Stain in Victorian Velvet, I built up the layers to give it a pale pink/gold vignette. Once dry I rubbed a conservative amount of black ink over the raised areas with my fingertips. To finish, I applied Liquid Pearls to the perimeter to give it a studded look.
The cameo is my own creation using a mold, which I inked up to give it the pink/gilt effect. I mounted the cameo on another Cheery Lynn Designs die from the Coved Rectangle Classic stack. The seam binding I hand dyed with Victorian Velvet Distress Stain to ensure the colours throughout were uniform. And the clock hand and watch part are courtesy of my local manufacturing jeweller. Thanks Mr Honeybun (yes - that is his name!). The centre of the watch hand is filled with a few pink seed beads.
Thanks for visiting. I'd love you to leave a comment, especially those visitors from far away!
21 February 2012
Cheery Lynn does it again!
I'm fascinated by the endless possibilities that Cheery Lynn dies can offer the average crafter.
In my previous posts, I told you I have been experimenting with making molds and clay embellishments. Who would have thought that Cheery Lynn dies are actually perfect to make molds with? So with that in mind, I would like to enter this project into the Weekly Challenge over at Cheery Lynn - "Frame It". I have used the dies as 'frames' for the molds.
This is a clay butterfly I made, using the Cheery Lynn die to first make a mold.
Here is a video I have put together for you to show you the process involved. It's so easy, and the results are fabulous. The background music comes and goes - slight technical hitch!!
And here is yet another use for the good old French Pastry doillie die...
I placed the die on a circle of ironed and starched calico, then sprayed it with Shimmerz. In other words, the die acts as a mask. The result is this fabulous batik like effect. I love it. The piece begged to be made into a pin cushion to house my own handmade stick pins. They look so pretty in there. I think this would make a lovely gift for a fellow crafter. And it only took me half and hour tops to make. Would have been faster had I not opted to hand stitch the sequin trim in place!
I hope this post inspires you to look at using your Cheery Lynn dies in other ways.
Thanks for visiting.
Labels:
Cheery Lynn,
Crafters Workshop,
Impasto Gel,
Lumiere Paints,
Sculpey
20 February 2012
And my exciting news is.....
Click the link to find out...
http://paperchase.typepad.com/nzpaperchasemy_weblog/2012/02/2012-elite-design-team.html
05 February 2012
Introducing...
So after much trial and error, I think I have this sorted! This is the first of my video tutorials that I'd like to share with you. Admittedly there are some 'finer points' that I need to work on - like keeping the project in the frame, but girls - I'm on to it!
Do you have a whole pile of diecut tags in your stash that you're not quite sure what to do with? I certainly do, so this tutorial demonstrates how to use them to make quick and simple cards. Hope you enjoy it.
PS Would love some feedback!
Do you have a whole pile of diecut tags in your stash that you're not quite sure what to do with? I certainly do, so this tutorial demonstrates how to use them to make quick and simple cards. Hope you enjoy it.
PS Would love some feedback!
30 January 2012
Pion Design - Times and Seasons
Auckland Anniversary Day today - annual holiday for the hoi poloi! Started off as a beautiful summers day, everyone in the pool, Dad cleaning the BBQ ready for a roast pork lunch - then the clouds (dark ones!) appeared! Still patches of blue however, but not the usual hot languid day we have come to expect come late January!
I did get a chance though to finish a layout I've been working on using some stunning Pion Designs paper. Lots of ink, texture paste, gold metallic rub n buff, liquid pearls, Crafters Workshop template and the obligitory smattering of flowers! Also a chance to use a beautiful lace border that I've had in my stash for some time.
Something different though - I made my own dressform (small one) and key. I found some molding clay at the shops the other day and have been making my own permanent molds. Lots of fun! Then I used good old polymer clay to create the embellishment, bake it, paint it and it's good to go!
Happy Monday everyone - off to check the BBQ!
I did get a chance though to finish a layout I've been working on using some stunning Pion Designs paper. Lots of ink, texture paste, gold metallic rub n buff, liquid pearls, Crafters Workshop template and the obligitory smattering of flowers! Also a chance to use a beautiful lace border that I've had in my stash for some time.
Something different though - I made my own dressform (small one) and key. I found some molding clay at the shops the other day and have been making my own permanent molds. Lots of fun! Then I used good old polymer clay to create the embellishment, bake it, paint it and it's good to go!
In other scrapworthy news ........it took me 7 hours solid to clean up my scrap room on Saturday! As you can imagne it was well overdue! Admittedly, I did go the whole hog and colour code my flowers, papers, reorganised storage for various bits and bobs and had a good purge of 'stuff' that is really never likely to make it onto a card/layout now! Good feeling!Happy Monday everyone - off to check the BBQ!
Labels:
Crafters Workshop,
Pion Designs,
Scrapmatts
26 January 2012
Cool Tools
So I shouted myself to a new punch last week - the EK Tools Large Flower Burst Edger. Love it! I used it to create my Scrapaholics Monthly Kit and also to fit the criteria to enter another fabulous Moxiefabworld challenge that requires you to...
"Create a paper crafted project (card, gift bag, tag, layout, home decor item, mini-book cover, etc.) that incorporates a punched element in an innovative way"
The base for this LO was Websters Paper and Bazzill. The journalling reads:
A lack of starfish embellishments around meant I had to get the Polymer Clay out of the cupboard and fashion my own. Once I had baked it, I painted it with shimmery aqua and cream acryllic and adhered tiny little silver balls over it (had these in my stash for about 5-6 years!). I also used a small piece of crumpled Tim Holtz tissue paper, again painted and inked. The little white shells came from one of many necklaces that we received when we arrived in Fiji on holiday a couple of years ago! And of course, there are some obligatory pieces of Paua (pron: pa-wa) shell scattered in amongst it all for a quintessentially kiwi feel!
Thanks for visiting. I absolutely appreciate all your comments, it makes my day to hear from you!
"Create a paper crafted project (card, gift bag, tag, layout, home decor item, mini-book cover, etc.) that incorporates a punched element in an innovative way"
The base for this LO was Websters Paper and Bazzill. The journalling reads:
A young
girl was walking along a beach upon which thousands of starfish had been washed
up during a terrible storm. When she came to each starfish, she would pick it
up, and throw it back into the ocean. People watched her with amusement.
She had
been doing this for some time when a man approached her and said, “Little girl,
why are you doing this? Look at this beach! You can’t save all these starfish.
You can’t begin to make a difference!”
The girl
seemed crushed, suddenly deflated. But after a few moments, she bent down,
picked up another starfish, and hurled it as far as she could into the ocean.
Then she looked up at the man and replied,
“Well, I
made a difference to that one!”
The old
man looked at the girl inquisitively and thought about what she had done and
said. Inspired, he joined the little girl in throwing starfish back into the
sea. Soon others joined, and all the starfish were saved. - adapted from the
Star Thrower by Loren C. Eiseley
A lack of starfish embellishments around meant I had to get the Polymer Clay out of the cupboard and fashion my own. Once I had baked it, I painted it with shimmery aqua and cream acryllic and adhered tiny little silver balls over it (had these in my stash for about 5-6 years!). I also used a small piece of crumpled Tim Holtz tissue paper, again painted and inked. The little white shells came from one of many necklaces that we received when we arrived in Fiji on holiday a couple of years ago! And of course, there are some obligatory pieces of Paua (pron: pa-wa) shell scattered in amongst it all for a quintessentially kiwi feel!
Thanks for visiting. I absolutely appreciate all your comments, it makes my day to hear from you!
24 January 2012
Simple Stories
I discovered the Simple Stories range of Scrapbooking papers last year, they are suitably grungy with a vintage look so naturally a selection of their papers found their way into my stash! I used some of the Life Documented range to complete the NZ Paperchase Monthly Challenge - where the focus of the layout had to be on the words rather than the photo. To boot, the journalling had to represent a recipe of some kind.
I used loads of stucco texture past, Lumiere Acryllic and distress ink on this layout. I created 2 pop-up cards (a la Karen Burniston) that when opened reveal a photo of my mother. The journalling is a 'recipe' for the things my mother taught me. And lots of fussy cutting of the teeny paper doillies around the edge!
I also dipped some small white roses into the Lumiere paint and let them dry. Really cool effect - almost like a metal flower. There's one on the top of each card.
Busy today finishing a layout for the Scrapaholics February Kit club. All will be revealed later!
Have a great day.
22 January 2012
Moxiefabworld Challenge
I've been a long time 'stalker' of this wonderful website. In fact it has now become instituted as part of my daily inspiration routine. Cath posts the most beautiful pics everyday - they truly are food for the soul! Click here to see for yourself!
So, I have finally found some time to participate in the January 'Map to your Heart' challenge. And just in the nick of time too!
The challenge is to...
"Create a paper crafted project (card, gift bag, tag, layout, home decor item, mini-book cover, etc.) that incorporates a map/s in an innovative way"
I created a pop-up card, that is operated by pulling the tag once you open the card. I used some cute chipboard letters that I found quite by chance at TYPO the other day, covered in old atlas pages, and some papers from October Afternoon, Pink Paislee and Simple Stories. My Cavalini & Co stamps came in handy for this project too!
Thanks for visiting.
So, I have finally found some time to participate in the January 'Map to your Heart' challenge. And just in the nick of time too!
The challenge is to...
"Create a paper crafted project (card, gift bag, tag, layout, home decor item, mini-book cover, etc.) that incorporates a map/s in an innovative way"
I created a pop-up card, that is operated by pulling the tag once you open the card. I used some cute chipboard letters that I found quite by chance at TYPO the other day, covered in old atlas pages, and some papers from October Afternoon, Pink Paislee and Simple Stories. My Cavalini & Co stamps came in handy for this project too!
Front
Inside with pop-up maps and words
Side view of pop-up.
I am thorougly enjoying my time off - getting crafty and participating in lots of challenges. Feels good!Thanks for visiting.
16 January 2012
On a Totally Different Tangent Today!
Before I get to my scrappy post, I like to introduce you to a friend of mine....Kindle.
I have to say it - I love my Amazon Kindle. I was lucky to get one for my birthday last year (after admiring my friends one for so long!). I have looked at other eReaders but none of them really seemed to grab me (screens too small, too fiddly to navigate etc). So I was wrapt to find that the Kindle does NOT disappoint! I know that for a lot of people there is the mindset of not having the 'hard' copy of the book with the charm of having 'real' pages to turn and bookmark etc and I thought initially that I would be the same. But no - I'm OK with the whole concept - which for a traditionalist like myself is quite surprising!
For an avid reader like myself, it is just fantastic for gettting immediate access to the latest books, magazines, newspapers etc. The prices are just so excellent too - here's an example...
The Poisonwood Bible by Barbara Kingsolver is about NZ $25.00 for paperback in the local shops. Through Amazon it's US$9.68 (about NZ$12.00). Fantastic story, and one that has inspired me to simplify my life this year.
Another example for Jodi Picoult fans, The Jodi Picoult Bundle which is 3 novels (Nineteen Minutes, Second Glance and Perfect Match) for US$7.26. Might just have to download that one myself!
If you are thinking about a Kindle, make sure you get the leather cover and reading light as well as a screen protector.
I'm always on the lookout for reading recommendations myself, so here are some books that I have particularly enjoyed...an eccletic mix but ones that are worth the read.
Water for Elephants by Sara Gruen (US$3.63)
The Heart Mender by Andey Andrews (US$8.99)
The Eighth Scroll by Dr. Laurence B Brown (US .99c - yes, really!)
Heaven is for Real by Todd Burpo (US$4.98)
I think the Kindle holds up to 1200 books at a time (you can archive the ones you have finished and pull them out anytime you want to refer to them). I haven't downloaded any magazines yet, mainly because I haven't had enough time to browse through the Kindle Store at length. The store is absolutely huge! There are also lots of freebies (I think most of the 'classics' like Oliver Twist are free since the authors are no longer around to collect royalty payments!).
I'd love to hear what you think of the Kindle if you have one, and some reading suggestions are always welcome!
So, onto scrapbooking!
In October last year at our Crafting and Cupcakes Scrapbook Day, I ran a class inspired by the wonderfully talented Jane Tregenza and her chipboard tile method. Here is my layout...
And a close up of the detail of one of the tiles...
Essentially, the layout is built on a series of chipboard squares and rectangles, each one uniquely embellished or holding a photo. So much fun to do, and seriously addictive. The 20 ladies who participated in the class each came out with amazing layouts - some used wedding pics, others used heritage. That's often the best part about teaching - having the chance to see other peoples photos and learn a bit about the story behind them.
So that's all from me today. Don't forget to send me your recommend reading lists if you have any!
12 January 2012
Lazy January Days
Card making in this less than ideal summer weather we are having, seems a strangely guilt free, acceptable thing to be doing! I'm on a roll at the moment, so here is my latest. It's a recessed card - a wee bit hard to see the actual recessed dimension in the photos but essentially you create something of a shadow box to sit down into the card front. I thought I was all done with the G45 Once Upon a Springtime papers - but I keep getting drawn back to them time and time again!
So, CHA in the USA is drawing near. Starting to see lot's of sneak peeks, very exciting. My friends Jodi and Hebie are lucky enough to be travelling to the event this year, so I'm looking forward to seeing their pics and hearing all about it!
As I mentioned, we are having a rather inclement summer so far! For a boredom buster, I bought Meg the Season 1 DVD of Bewitched (who remembers this programme aired in the 70's with Samantha, Darren, Endora and Aunt Clara??). Bewitched was one of my favourite TV programmes, so I was thrilled to find all the seasons available at JB HiFi. They also have other gems like, I Dream of Jeanie, Beverly Hillbillys, ALF and heaps more.
Right, while the sun is out momentarily, I'll take the children for a quick swim to relieve their holiday boredom!
Thanks for visiting.
07 January 2012
Gearing Up for Easter!
Shocked, amazed stunned even - to see Hot Cross Buns and chocolate Easter bunnys available for sale at the supermarket yesterday! Haven't really even recovered from Christmas yet!
But if it's good enough for merchandisers to be preparing for Easter then it's a good enough excuse for me to start Easter crafting! So, given our summer is so wet, rainy and dismal at the moment, I took a few hours today to indulge in some guilt free crafting time (after the housework was all done and washing folded and put away of course!).
It was also a good excuse to use some of my beautiful Easter images from Pion Design. I decided to create a tryptych card today, and I thought I'd share it with you...click the pics below to get a closer view.
Supplies:
Bazzill Card stock
Girls Paperie paper
Pion Design Bunny image
Prima vine
Stick from the garden
Pink feather fluff
Seam binding that I hand dyed myself
Watch face (one of many that my generous manufacturing jeweller gave to me)
Lace (unknown)
Tea Dye Distress Ink (lots of!)
Kaiser Pearls
If you haven't checked out the incredible vintage styled papers from Pion Design (Swedish for Peony which also happens to be my all time favourite flower - alas it's too warm to grow them here in Auckland) then click the link above to view their blog and spend some time browsing through some vintage goodness.
Happy New Year to you all.
Labels:
Distress Ink,
Girls Paperie,
Kaiser,
Pion Design,
Prima
11 December 2011
Seasons Greetings
And here we are....December already! Even the kids have wondered where this year has gone to!
In between my work schedule (extraordinarily hectic of late!) and homelife, I have managed to pull together a couple of cards that I'd like to share with you. I wanted to use some 'non-traditional' elements this time - just a wee challenge for myself! So I bought an old trashy Mill & Boons from the library for 50c and used some pages as the basis for the cards.
My beautiful 7 year old Meg, wanted to join in the challenge, and made these adorable little tags, in keeping with the theme using book pages.
Meg and I have some exciting news for you all. But we can't tell until next year cause we're still working on putting it all together. But we will tell you that it is something deliciously crafty! So stay tuned....
Wishing all you a wonderful, peaceful and truly joyful Christmas with you families and loved ones.
Maggie & Meg
xxx
10 August 2011
Yay! A New Reader!
This probably sounds quite pathetic - but I have a new reader to my blog! Welcome to Delightfully Crazy who has a 'must visit' blog of her own full of loveliness and inspiration. It's great to know that someone has dropped by your blog! So leave her a comment when you do!
09 August 2011
Cheery Lynn Designs
Happy Tuesday!
About time I uploaded my card for the Cheery Lynn Designs DT call. I've used the gorgeous doillie and butterfly dies to embellish this card. The dies work PERFECTLY for both cards and layouts. Watch this space for a layout using the Cheery Lynn trellis. So cool - one of my faves! And if you're wondering how to get you hands on these dies, pay a visit to Jodi at Scrapaholics or go online.
To check out all the other amazing entries, click here.
29 July 2011
Some Digital Freebies For You...
Happy Friday!
Last day of the school holidays today so the children and I went to see King Fu Panda 2 at the movies. I have to say that it is almost better than KFP 1. A very charming story with a good moral theme running through it.
Some time ago I was designing some digital scrapbook items for Eidou. Sadly Louise found that is was way too prohibitive here in NZ to run the site so she had to close it. However, I still have my designs tucked away on my hard drive so I thought it might be nice to share some with you - for free of course!
Here are some pretty floral images and some sweet cherubs that you are welcome to save and use as you wish...just right click and Save As.
If you do download these and use them, I'd be thrilled if you would send me a link to show me what you've done! Hope you enjoy them.
Keep watching this space as I'll be posting some more freebies soon.
I'll leave you with a layout now, using Glitz Designs papers and stamps. Love the moodiness and grunge that Glitz incorporate into their papers. So versatile.
Thanks for stopping by.
26 July 2011
16 July 2011
Websters Workshop Part II and other tidbits!
Today I have the second layout for my upcoming Websters Workshop to share with you.
Click the pictures to get close up details...
Using BoBunny Gabrielle, it's hard to go wrong really!
Also, last month I was fortunate to attend the Brisbane Scrapbook Expo. Here is a class I attended, by Suzanne Tonga. Gorgeous layout huh? She's a very talented lady.
Click the pictures to get close up details...
Using the Garden Gala papers, a digital Websters download for the tree, which is embellished with vintage seam binding blossoms and trunk. Love the digital elements that Websters offer for download. Print them on to Safemat paper and voila! you have your very own homemade transfer of sorts! So cool!
If you'd like to know more about this technique for creating your own transfers/rub ons, leave me a comment on this post with your email address and I'll send you the details.
I'm also running a Vintage Seam Binding Card Class at my LSS in August. Here are some pics of the cards...
Using BoBunny Gabrielle, it's hard to go wrong really!
Also, last month I was fortunate to attend the Brisbane Scrapbook Expo. Here is a class I attended, by Suzanne Tonga. Gorgeous layout huh? She's a very talented lady.
Thanks for stopping by!
Labels:
Bobunny Gabrielle,
Glitz,
Websters Garden Gala
04 July 2011
Websters Workshop
There is a slight conundrum here - in that people LOVE the papers that Websters create, but are either too scared to cut into them (I can so relate to that!!) or not entirely sure where/how to start a page as the designs are so beautiful!
So enter our trusty LSS, Scrapaholics. I had a chat with Jodi, and she's 100% on board with my idea of hosting a Websters Workshop. And that my friends, is what I've started work on this weekend.
Here is the first of 4 layouts that I plan to teach. I know the paper is from an older range (Seaside Retreat), but that doesn't stop it from being scrapworthy does it? I used lots of Shimmerz to colour up a length of muslin and modpodged it around the photo, then when dry I applied various inks to add more depth. I was a bit stuck for starfish, so I got out the good old paperclay and made my own! When they were set I spritzed and coloured them with Shimmerz to get the luminous effect. So much fun!
Right oh, off to start work on the second layout.
Thanks for stopping by.
Subscribe to:
Posts (Atom)